I spent years thinking shorter meant boring. Then I cut my hair and learned that shape, not length, does the work.
I stopped chasing “Instagram curls” and started living with hair that moves without fuss.
These styles are the ones I actually wore—through humid summers, bad salon days, and quick mornings. They work.
27 Gorgeous Short Wavy Hairstyles For Women Over 40 For Youthful Style
These 27 hairstyle ideas are practical, wearable, and tested on real hair. I’ll show you why each one works, who it flatters, and what I used to get it. These 27 looks cover bobs, crops, bangs, and soft waves you can actually live with.
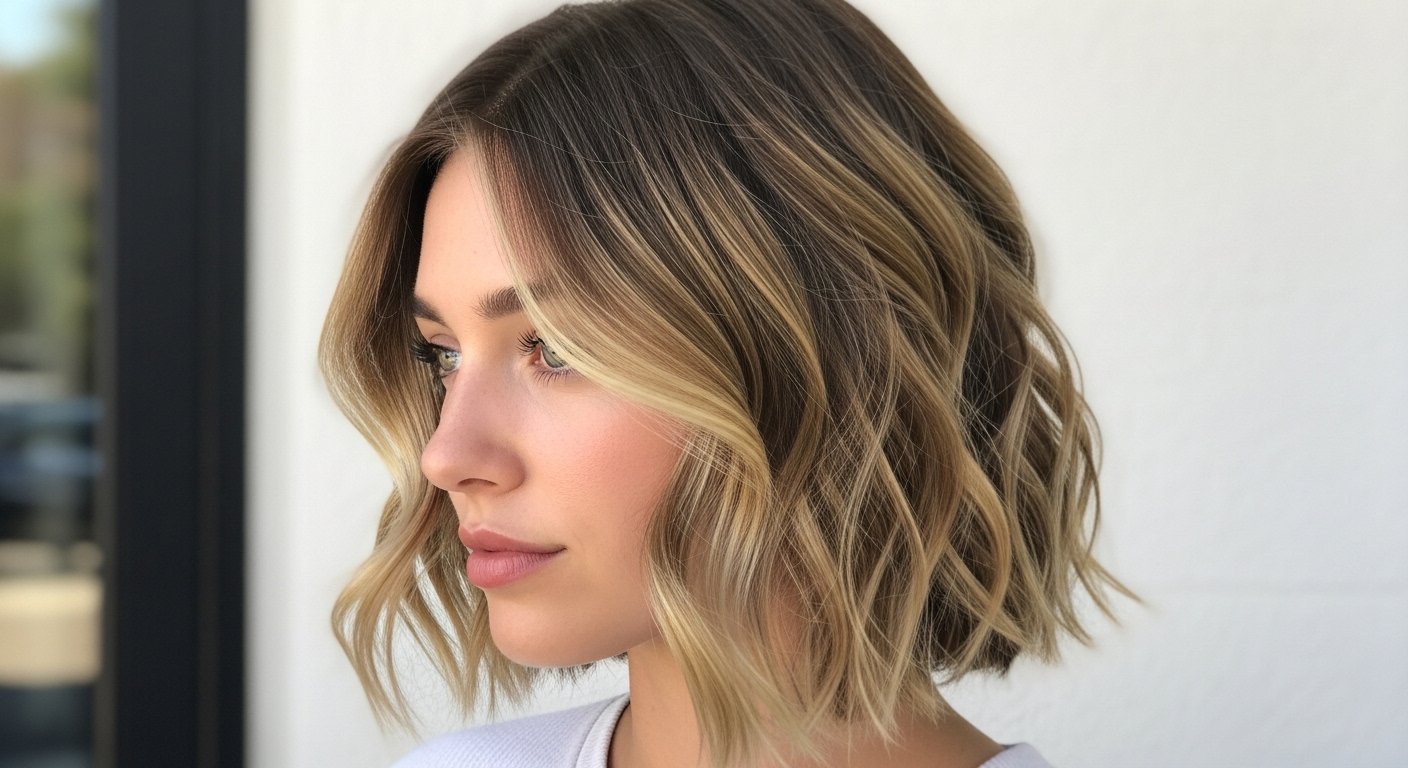
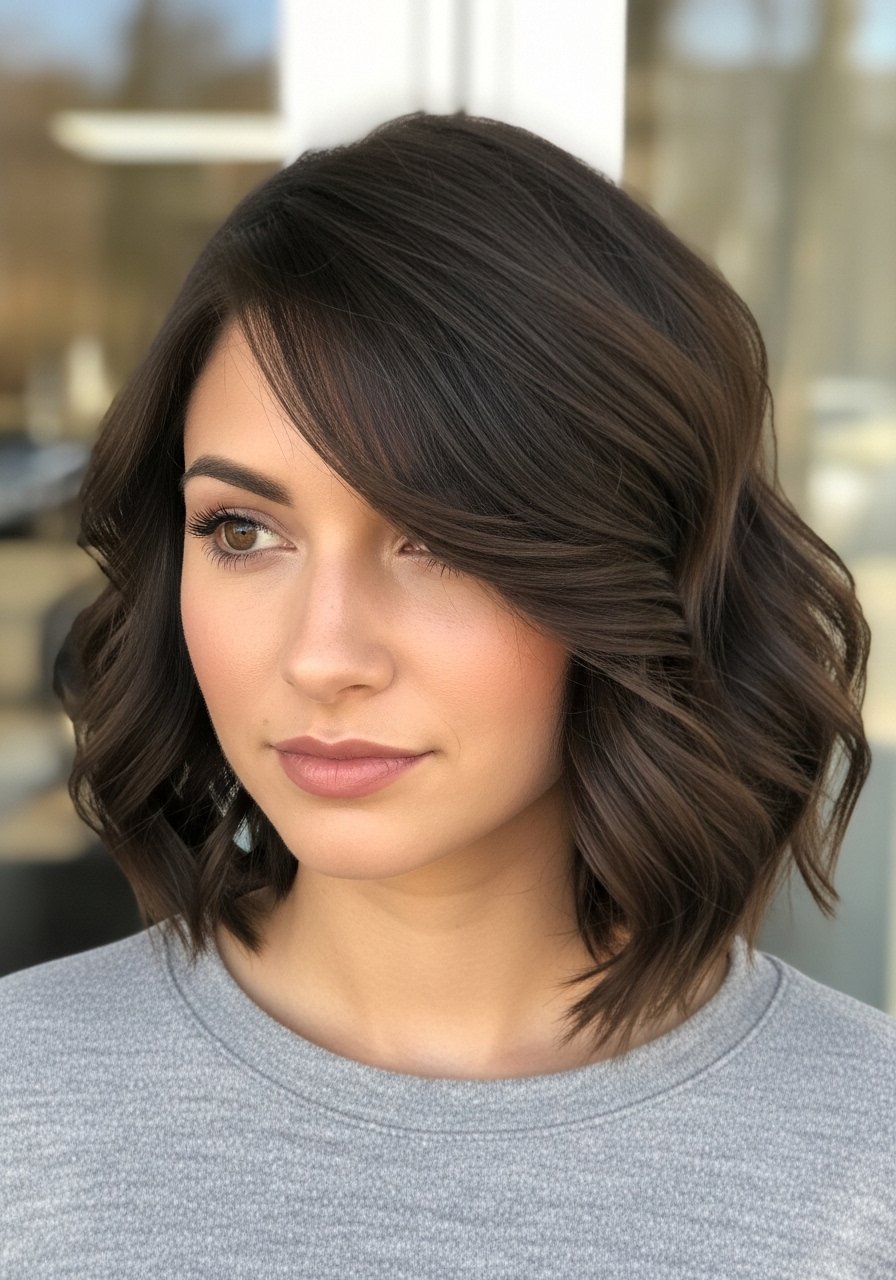
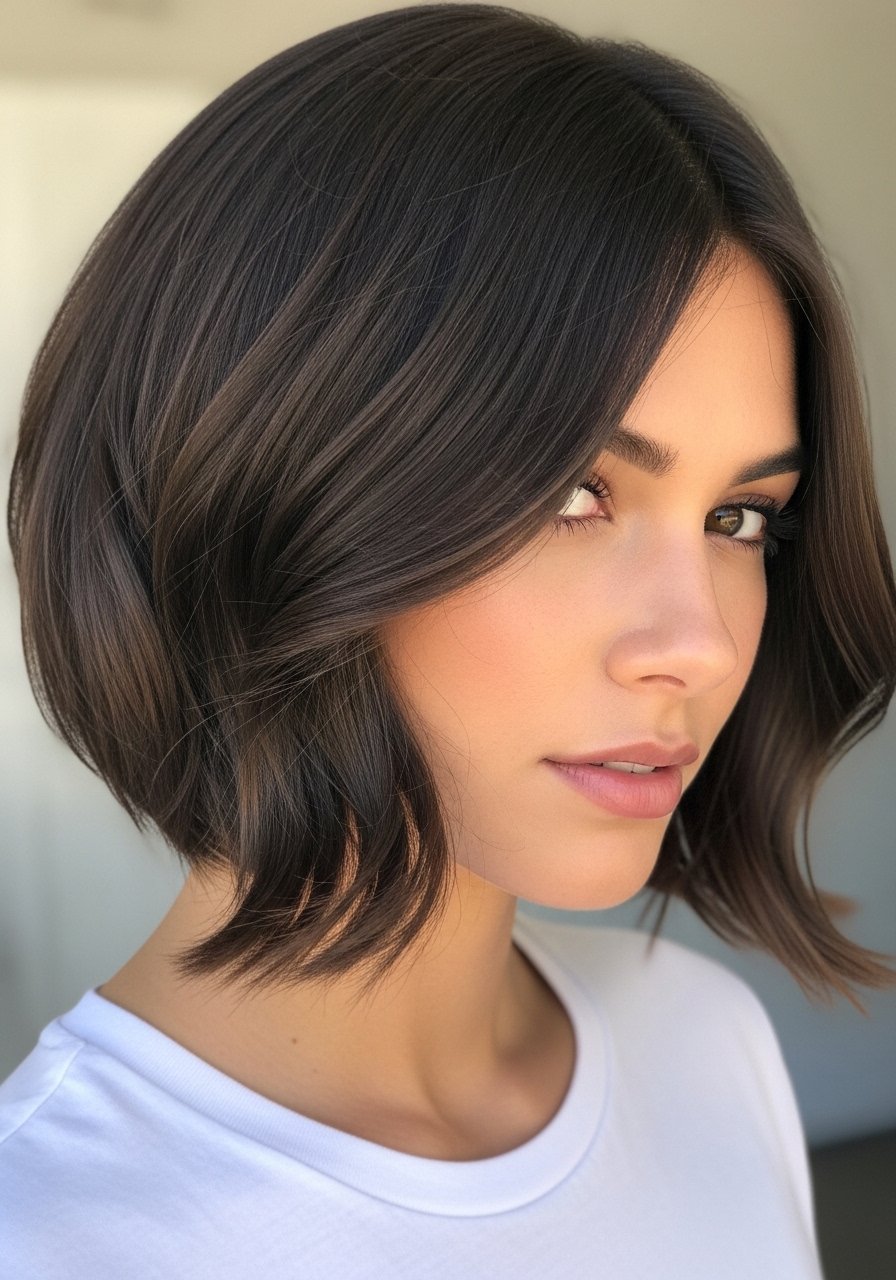
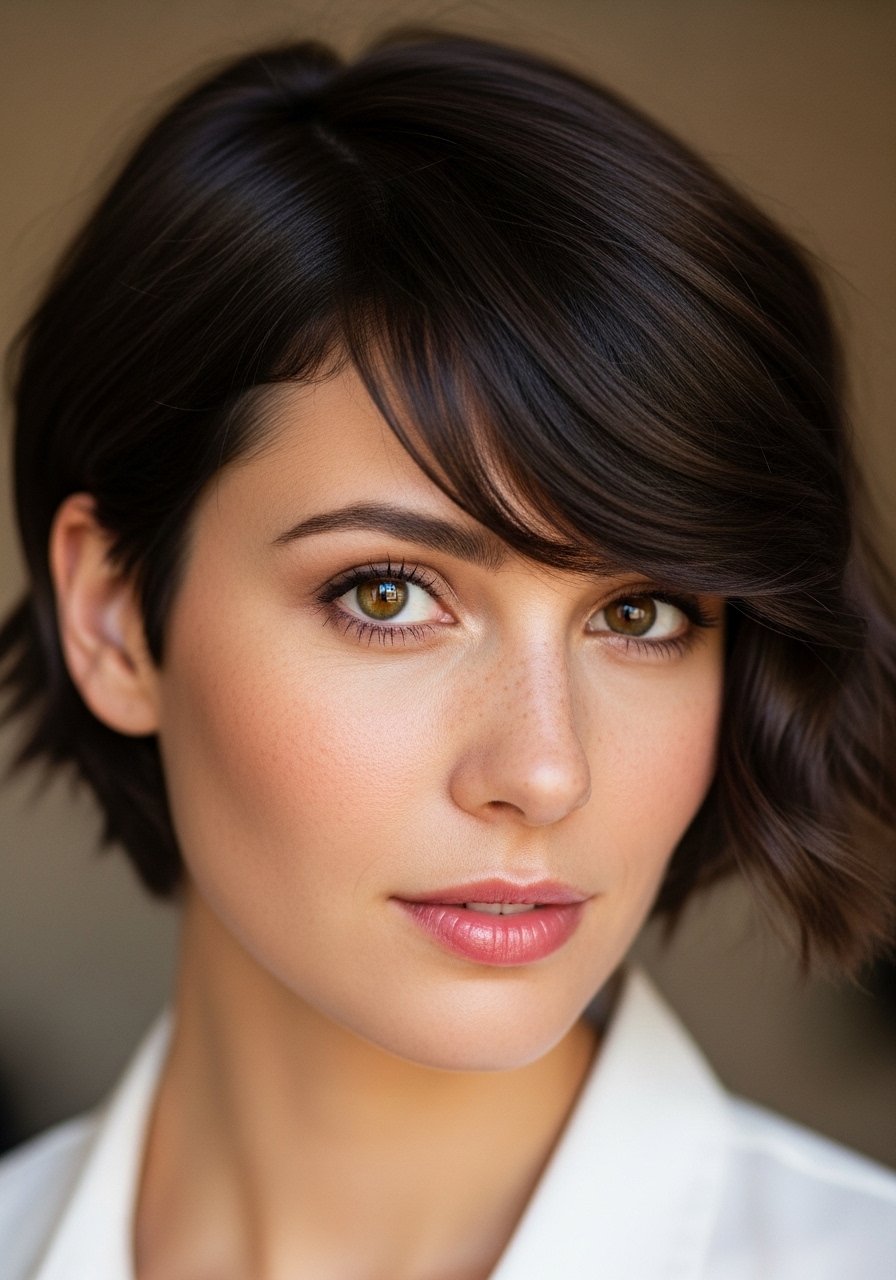
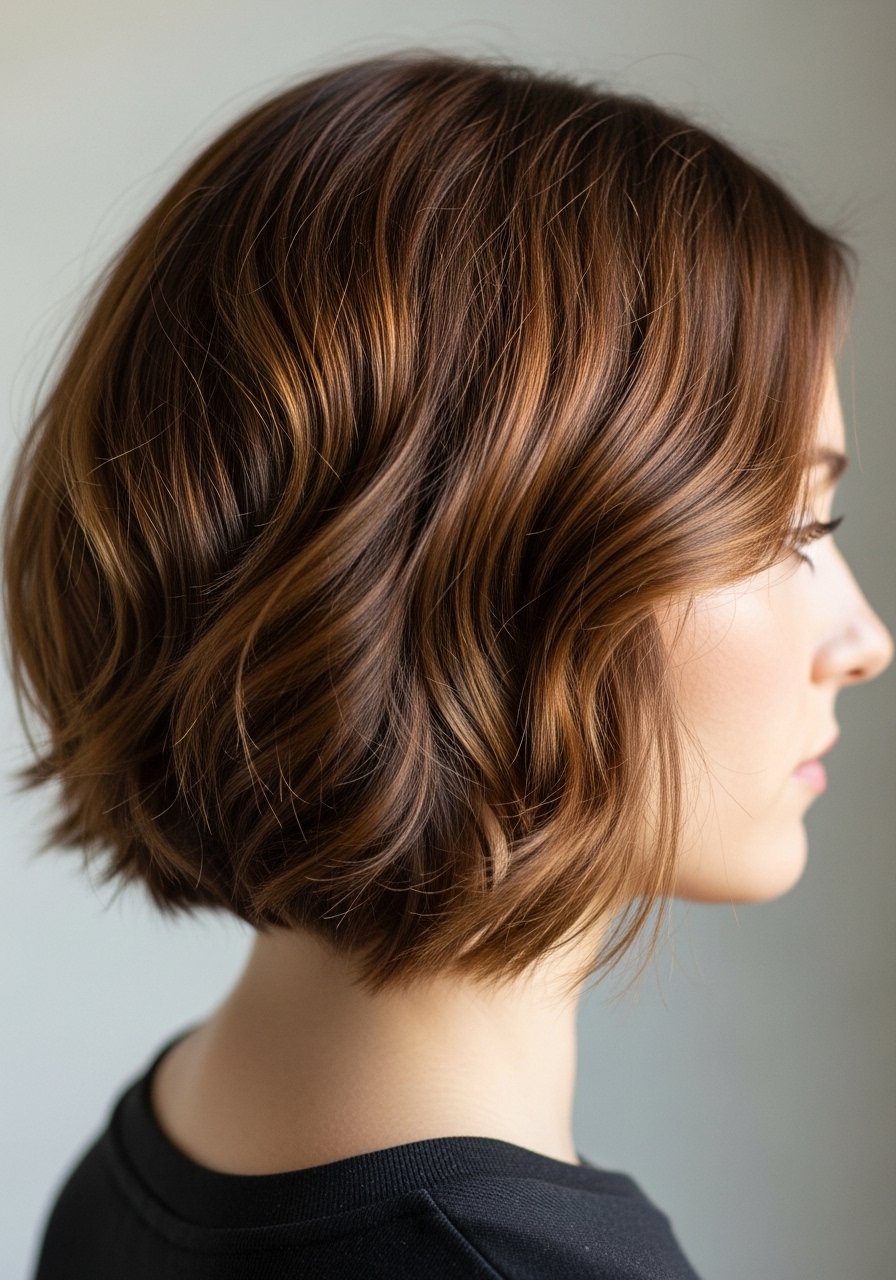
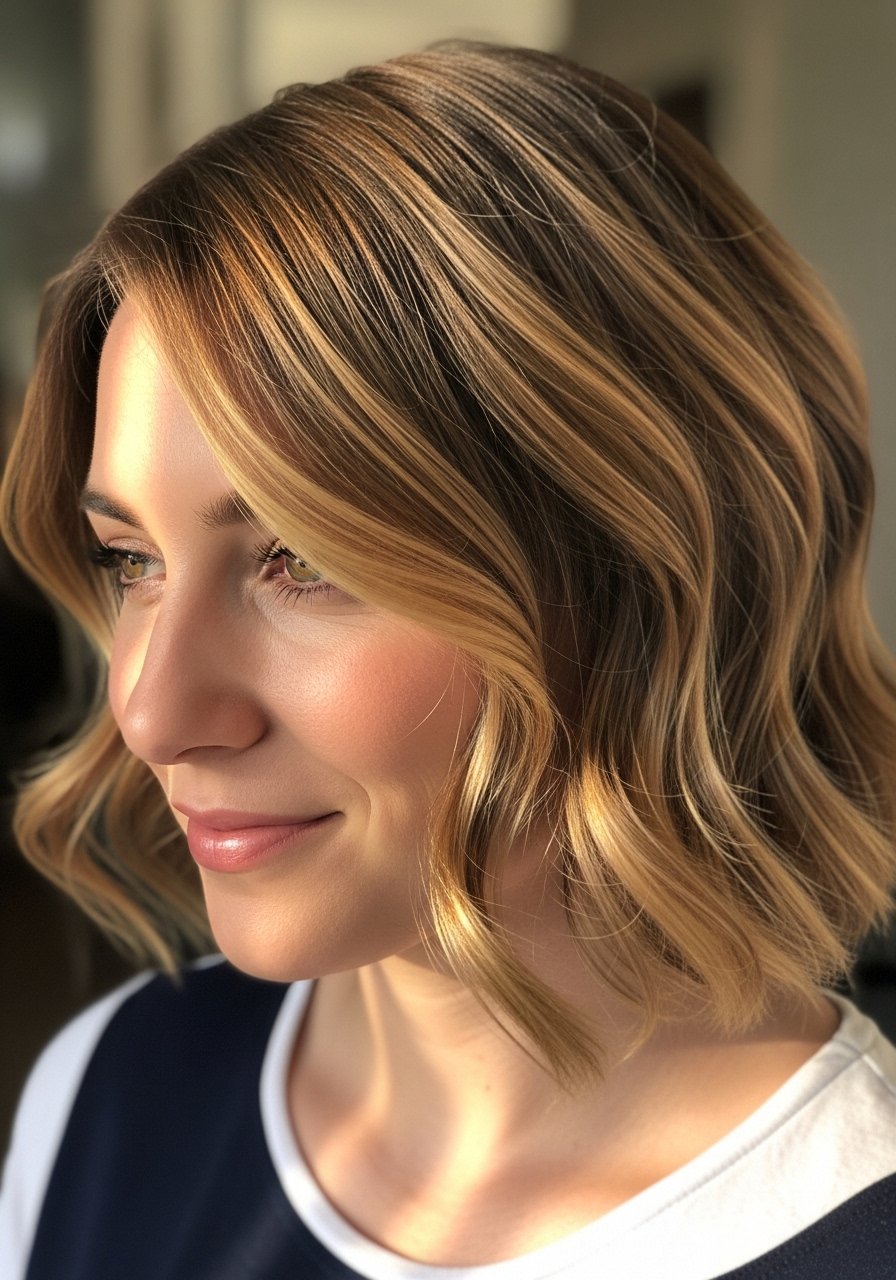
1. Soft Chin-Length Wavy Bob That Frames the Jaw
I cut my hair to the chin and kept soft layers. It opened my face without looking heavy. The waves sit right at the jaw and give movement. I noticed it hides the jawline I wasn't loving but still feels modern.
On humid days the waves loosen, which I like. Too many layers made it poofy once—lesson learned: keep the layers subtle.
What You’ll Need for This Look
- 1.25-inch curling iron – soft, natural waves
- lightweight texturizing spray – adds separation without crunch
- heat protectant spray – frizz control
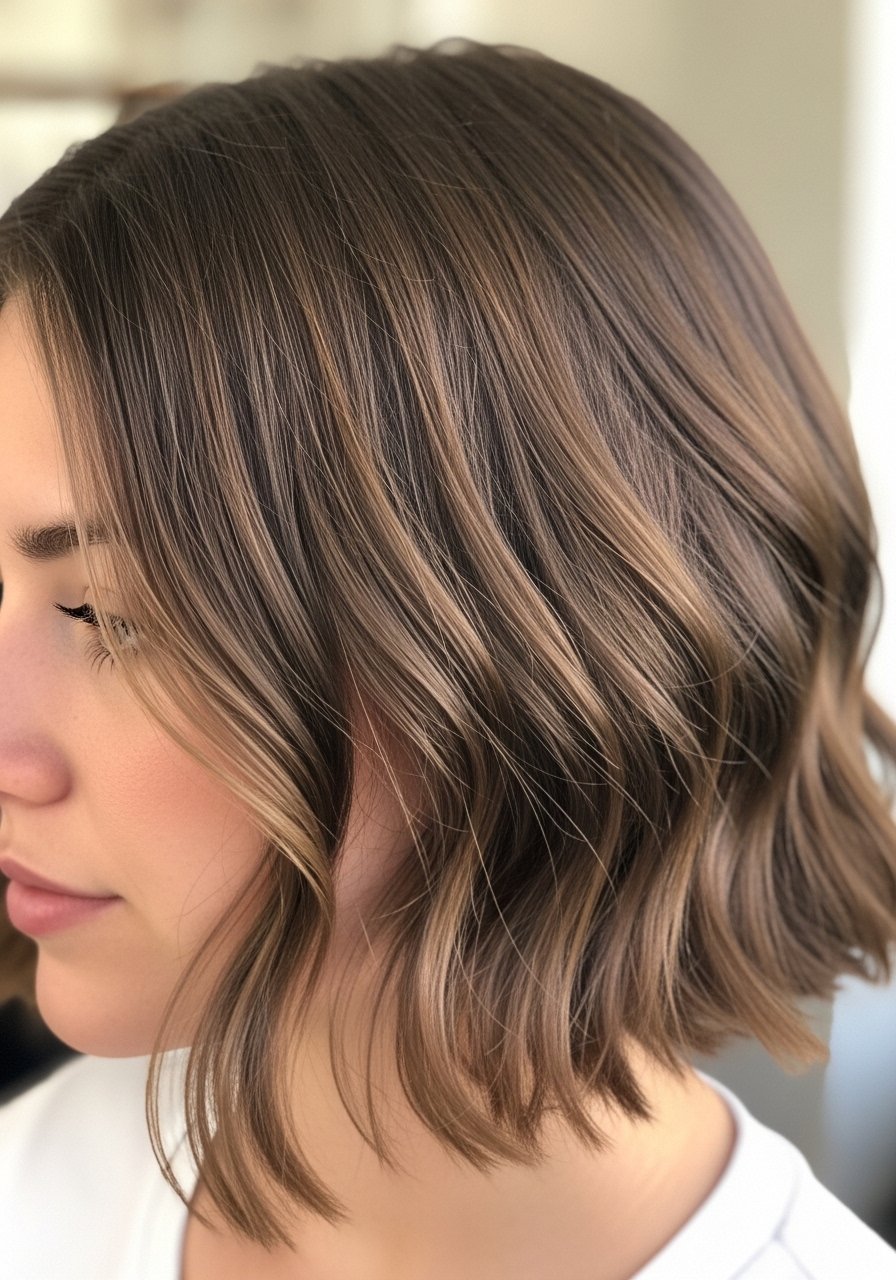
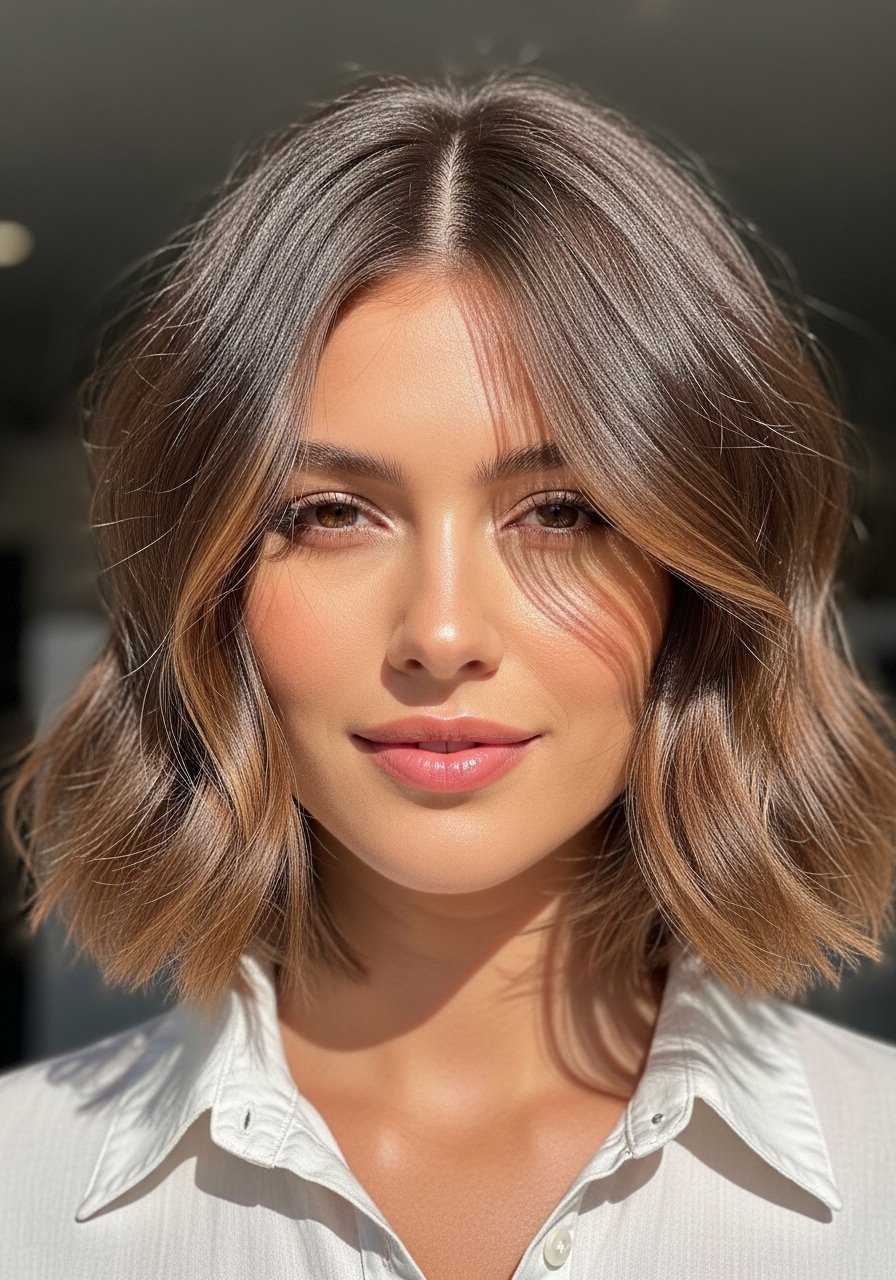
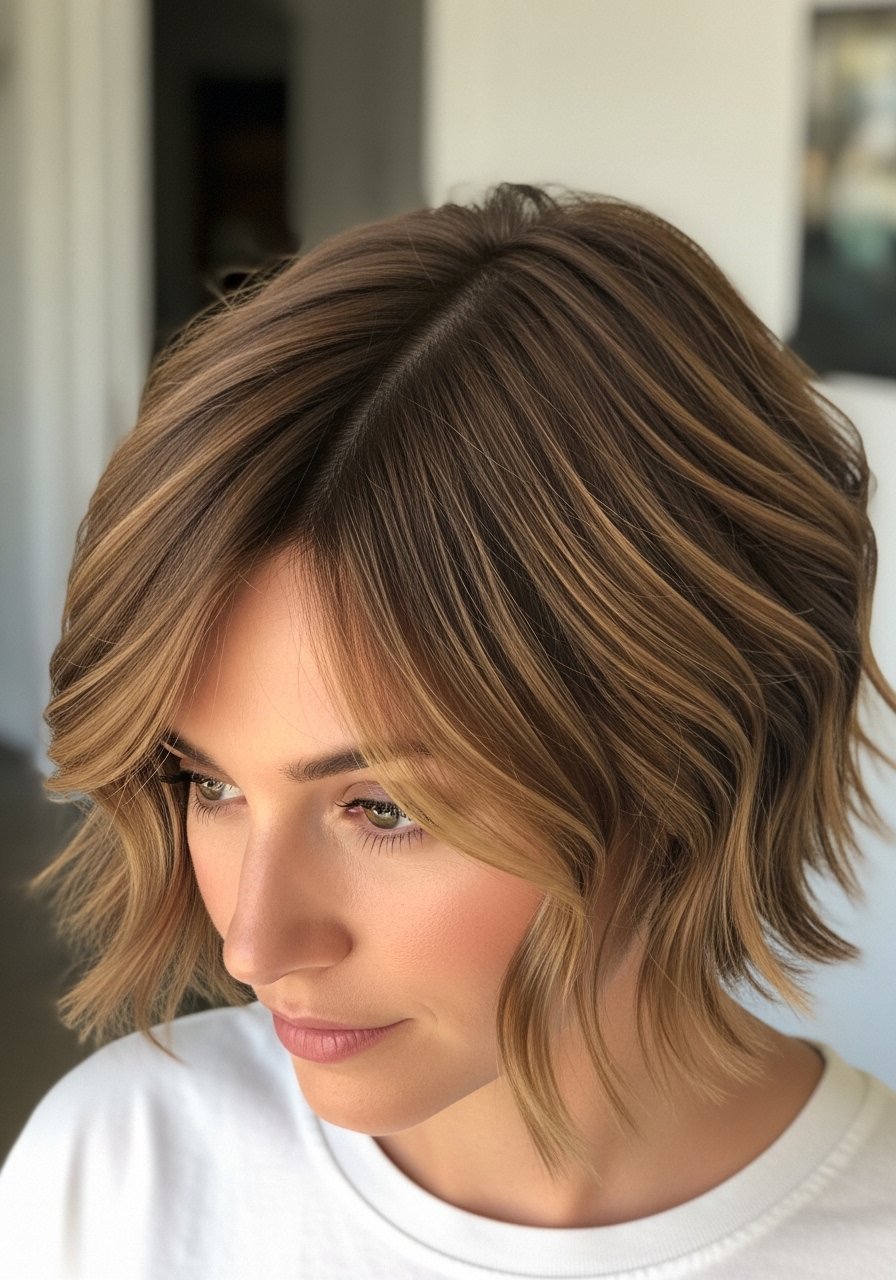
2. Wavy Lob with Face-Framing Layers for Softer Cheeks
I kept length a little below the shoulders and added long face-framing layers. It softened my cheek area and felt instantly younger without screaming “trying too hard.” The waves give body and the layers prevent the ends from looking heavy.
This suited my slightly fine hair—volume at the roots stayed all day with a bit of product. Beware: too much product flattens the lob fast.
What You’ll Need for This Look
- Round blowout brush for medium-length hair – root lift while drying
- 1.5-inch curling iron – loose, lived-in waves
- lightweight volumizing mousse – for fine hair
3. Short Textured Crop with Beachy Waves
I chopped most of the length but left the top long enough for tousled waves. It’s an easy wash-and-scrunch style that feels modern and casual. My hair gained texture and didn’t fall flat by midday.
One misstep I made was using too-heavy cream at first; it weighed the waves down. Switched to a salt spray and it behaved much better.
What You’ll Need for This Look
- sea salt spray – natural texture for short hair
- 0.8-inch curling iron – for quick definition on top
- matte paste – separates without shine
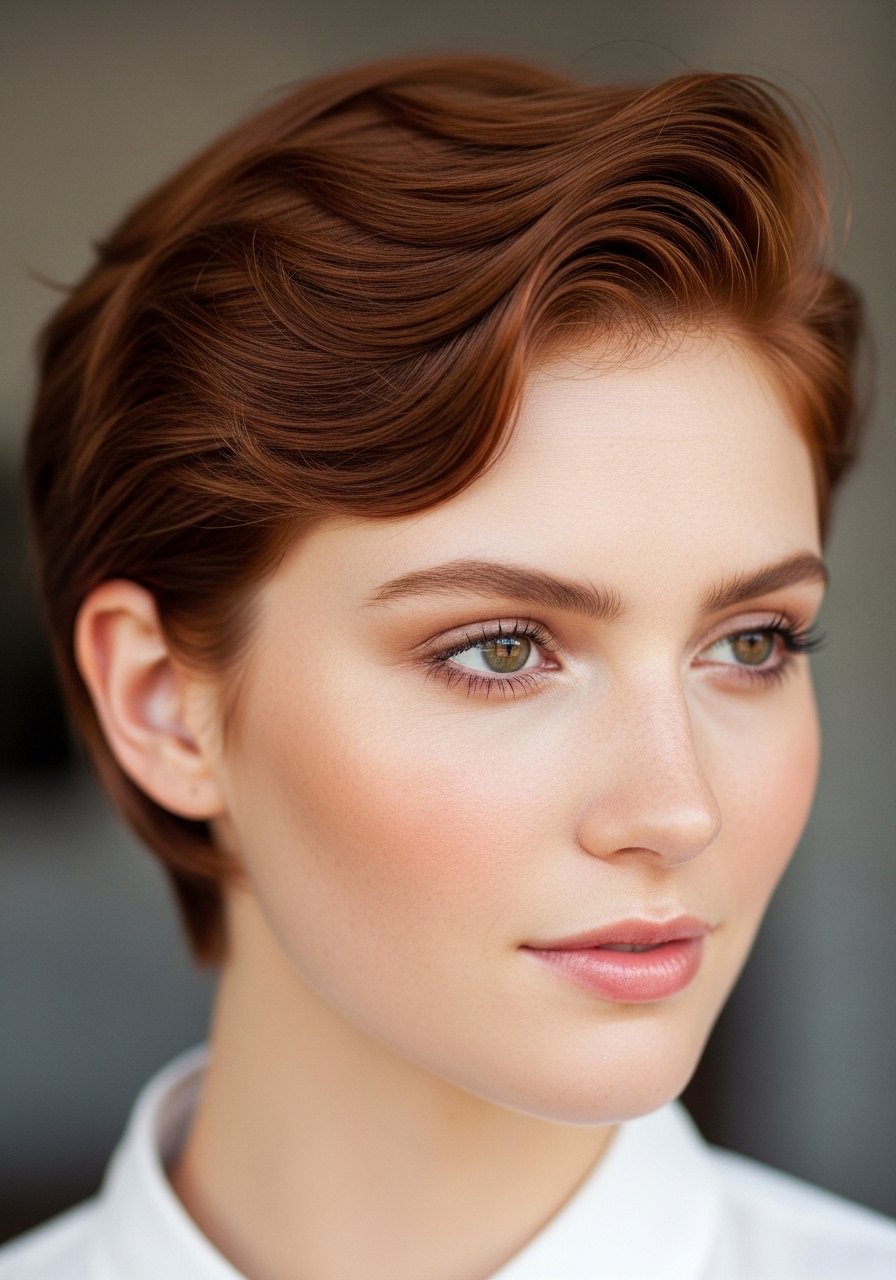
4. Layered Pixie with Soft Wavy Top
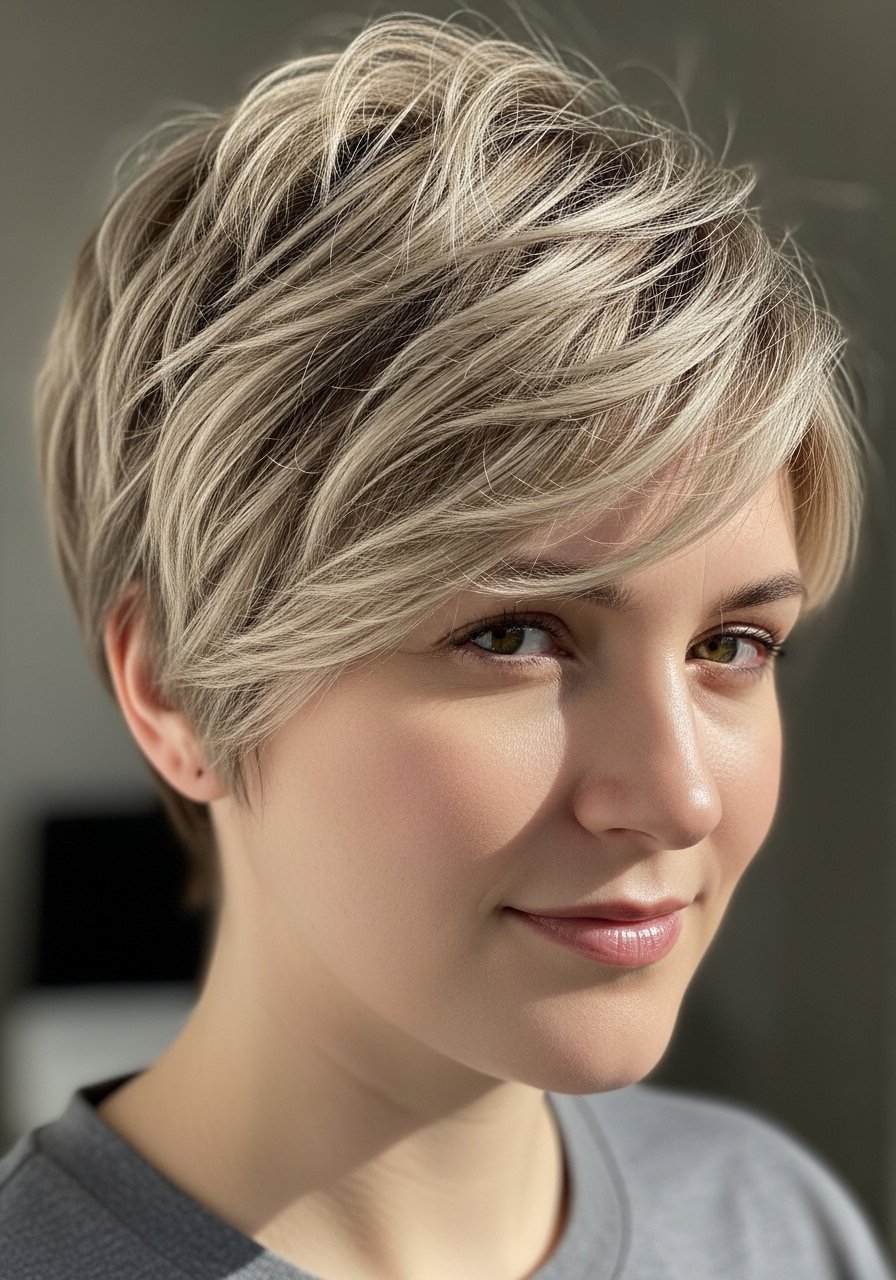
I was nervous about a pixie, but leaving waves on top made it wearable. The length at the crown gives lift and the cropped sides keep it clean. It’s low-maintenance for mornings and looks put together.
The trick: ask your stylist to keep the top slightly longer. I once cut it too close and it shrunk the waves—hard to recover quickly.
What You’ll Need for This Look
- small round brush for short hair – smooths roots when blow-drying
- light-hold hair wax – shapes the top without stiffness
- heat protectant spray (travel) – daily protection
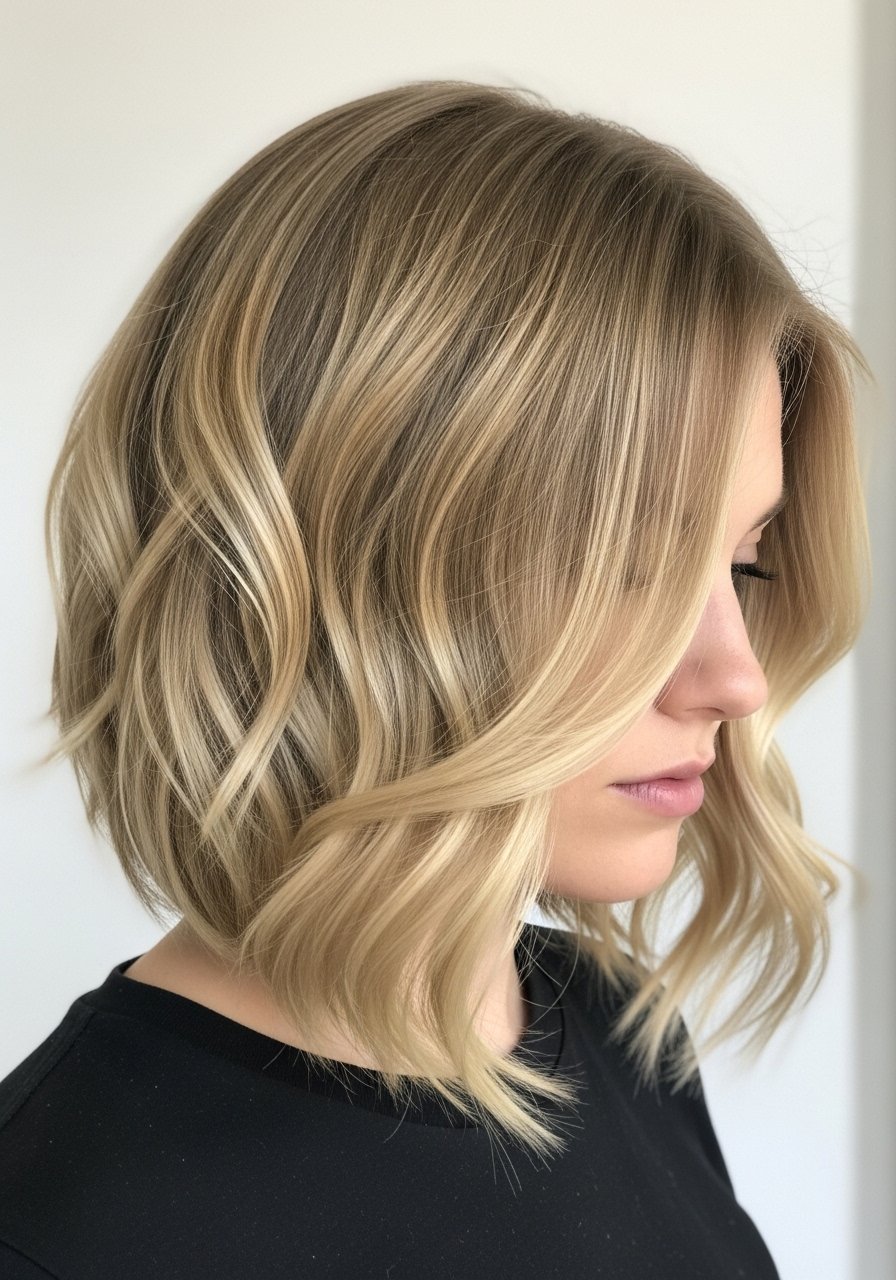
5. Soft Stacked Bob with Loose Waves for Lifted Crown
I tried a stacked bob to get more lift at the crown. When I added loose waves, it looked fuller and avoided that “helmet” shape. The stacked layers at the back give natural volume and the waves soften the silhouette.
If your stylist overstacked, it can look too rounded—ask for softer graduation. This cut hides thinning at the crown nicely.
What You’ll Need for This Look
- Velcro rollers for crown volume – lift without heat
- 1-inch curling wand – loose, soft waves
- root lifting spray – extra bounce
6. Curly Pixie with Long Side Fringe (Keeps Hair Playful)

I liked the soft contrast of a short back with a longer, wavy side fringe. It frames the eye and gives movement. I wore it to soften my features and it felt playful without being juvenile.
I learned that heavy bangs in short cuts get oily faster—dry shampoo became essential. This works great on naturally wavy hair.
What You’ll Need for This Look
- travel dry shampoo – keeps fringe fresh
- curl defining cream – shapes natural waves
- paddle brush – smooths sides
7. Wavy A-Line Bob That Slims the Face
I went A-line to get a slimming effect. The longer front pieces draw attention down and the waves keep it from looking severe. This shape feels modern and gives the illusion of length without extra weight.
On my thicker days it can look heavy—texturizing the ends fixed that. If you have a round face, the longer front is flattering.
What You’ll Need for This Look
- texturizing scissors – soften ends (stylist tool)
- 1.25-inch curling iron – shape the front pieces
- lightweight shine serum – smooth ends
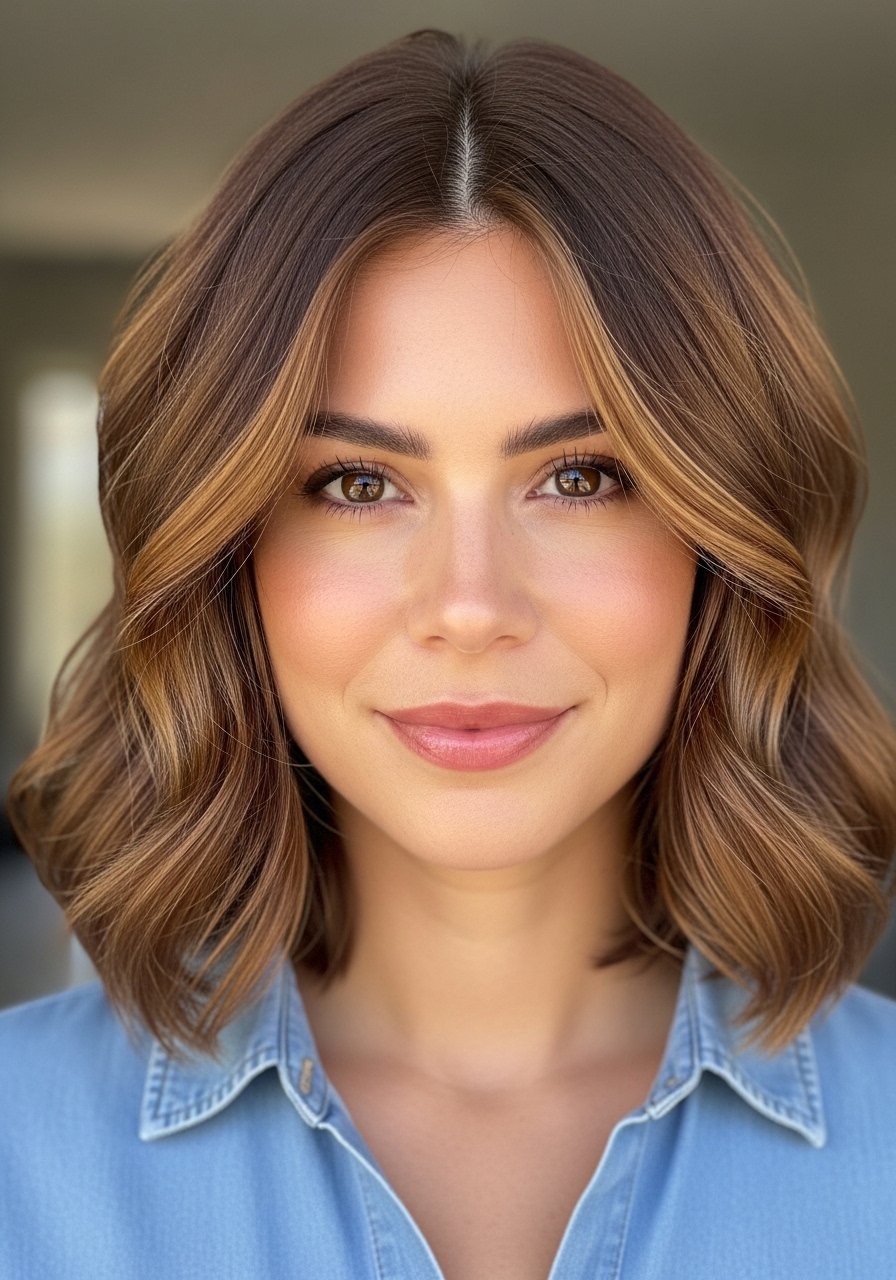
8. Soft Curtain Bangs with Wavy Lob (Age-Friendly Fringe)
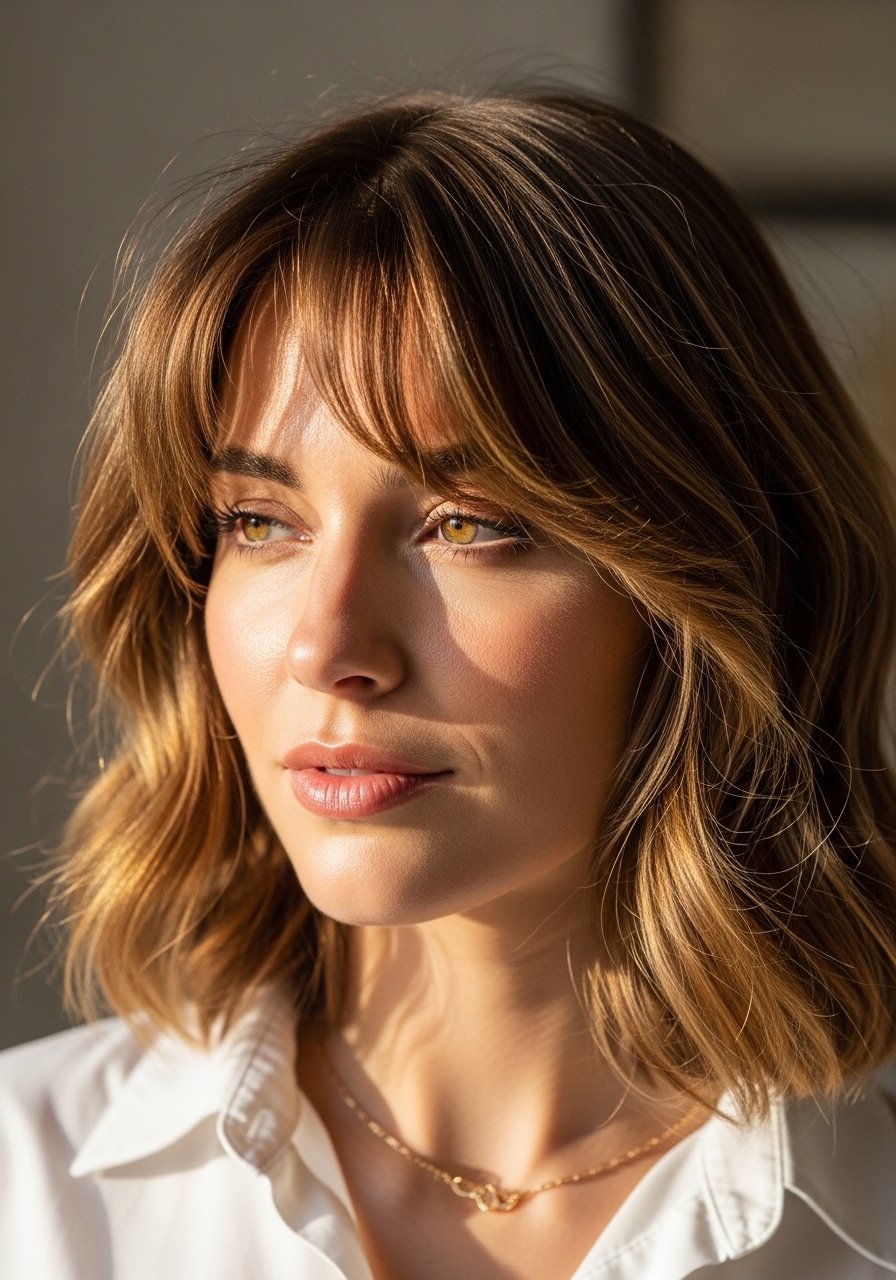
I tried curtain bangs to soften my forehead lines. They blended into my lob and framed the face without heavy commitment. The waves make the bangs look intentional and natural as they grow out.
Initially I cut them too short and had an awkward grow-out—go longer than you think. For most faces, curtain bangs are forgiving.
What You’ll Need for This Look
- small flat iron for bangs – shape and smooth curtain fringe
- lightweight hairspray – keeps the fall without stiffness
- round brush for bangs – gentle lift while drying
9. Wavy Inverted Bob with Soft Face Layers
I got an inverted bob for a little drama without fuss. The waves soften the angular line and the face layers keep it flattering. It gives structure but stays soft.
If your stylist angles it too sharply it can look harsh—ask for softer graduation. This was my go-to for polished days.
What You’ll Need for This Look
- ceramic flat iron – smooth the front pieces
- texturizing spray (medium hold) – natural separation
- anti-frizz serum – calm flyaways
10. Wavy Short Shag with Soft, Choppy Layers
I adopted a short shag when I needed texture. Choppy layers add movement and the waves make it feel lived-in. It’s forgiving when I skip a day of styling and looks good with minimal effort.
One mistake I made was over-thinning the ends at home—don’t. When done right, it masks thinning and adds personality.
What You’ll Need for This Look
- sea salt spray – lived-in texture
- light texturizing spray – separates layers
- styling scissors – for trims (stylist tool)
11. Sleek Wavy Bob with Deep Side Part
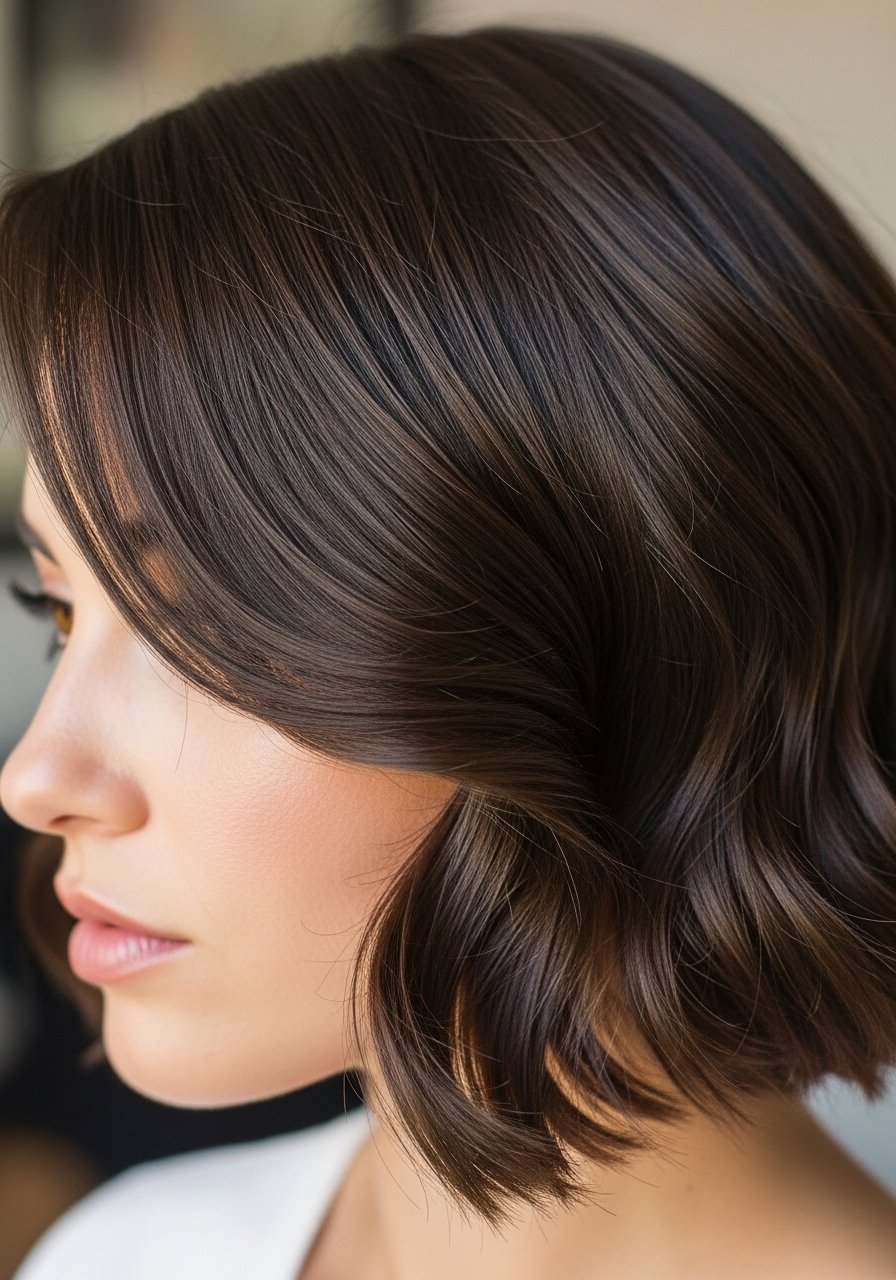
I used a deep side part to make my waves look polished. The swoop across the brow lifts one side and makes my face look longer. It reads sophisticated but still soft.
Watch the shine products—you want gloss, not grease. A good serum in small amounts does the trick.
What You’ll Need for This Look
- lightweight shine serum – glossy finish
- 1-inch curling iron – defined waves
- wide-tooth comb – soften curls gently
12. Short Layered Bob with Soft Permed Waves

I tried a soft perm for low-maintenance waves. The texture stayed through humid days and styling was quicker. The layers kept the perm from looking too tight or too juvenile.
Perms are a commitment—my hair needed extra conditioning afterward. If you want less upkeep, ask for looser rods.
What You’ll Need for This Look
- deep conditioning mask – restores moisture post-perm
- leave-in conditioner – daily hydration
- wide-tooth comb – detangle gently
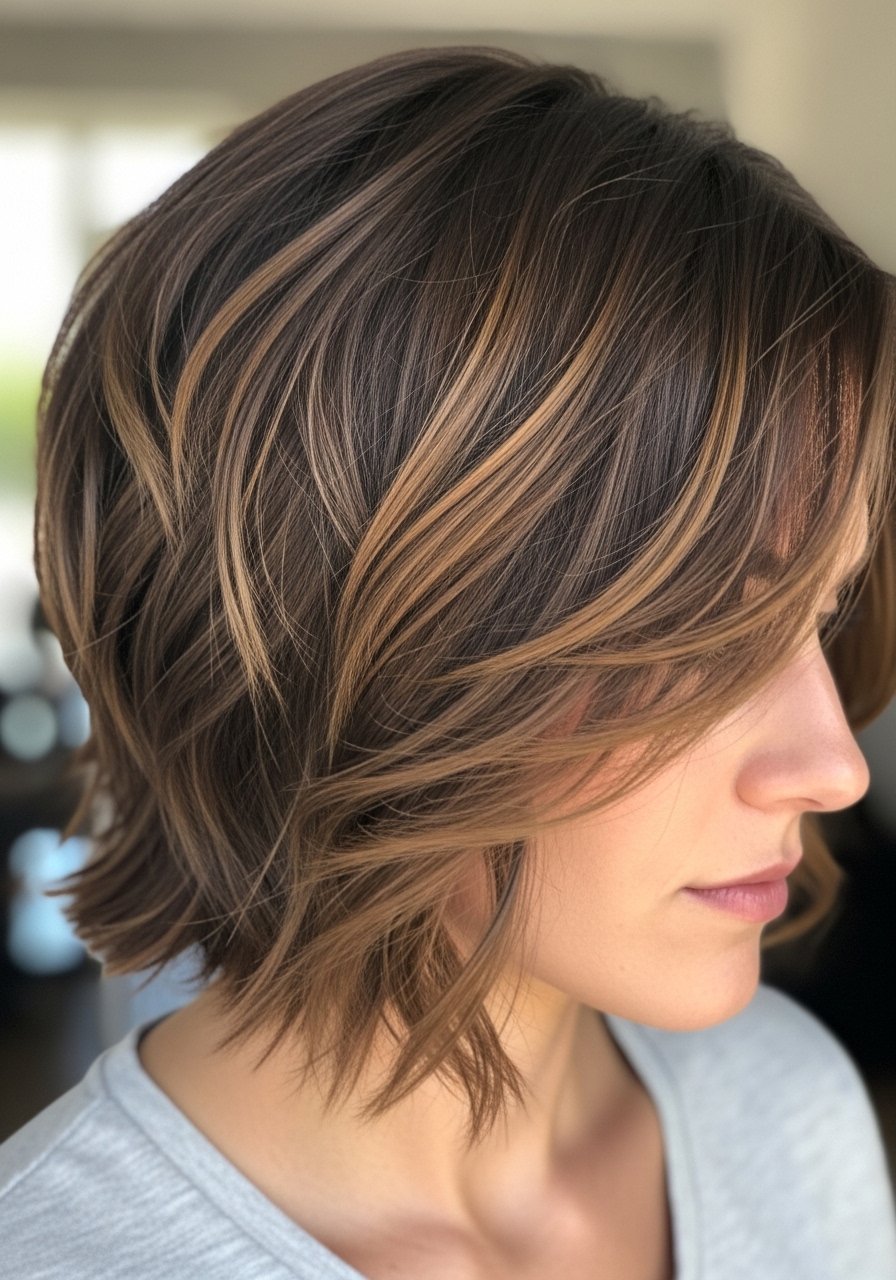
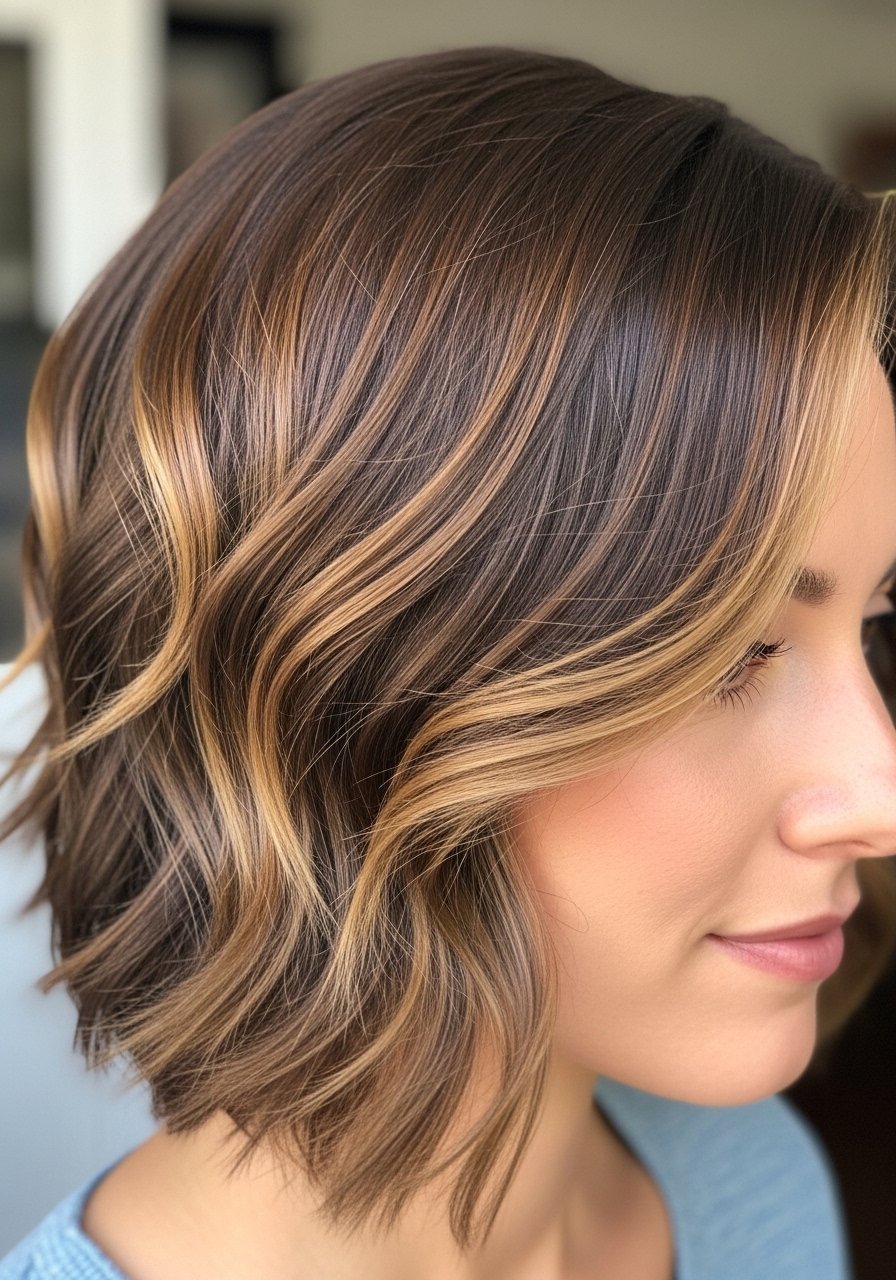
13. Wavy Bob with Subtle Highlights to Add Dimension

I added soft highlights and it made the waves pop. Dimension helps thin hair read fuller and hides regrowth. The highlights around the face brighten my complexion too.
I once over-highlighted and it aged the cut—go subtle. Ask for hairline-softening highlights.
What You’ll Need for This Look
- color-protect shampoo – keeps highlights fresh
- gloss treatment – revive color and shine
- heat protectant spray – protect colored hair
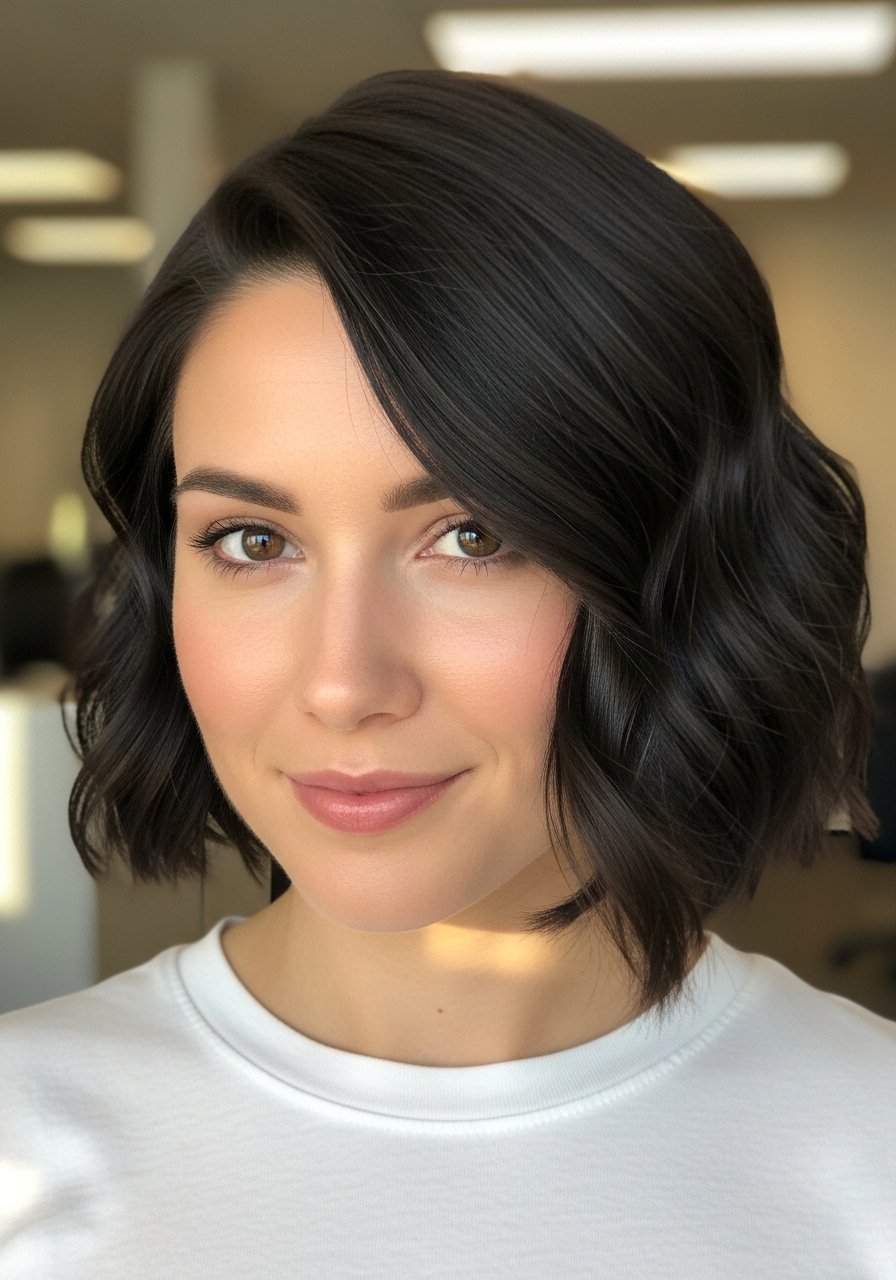
14. Tousled Chin Bob with Slightly Off-Center Part
I wear this when I want easy volume and low polish. Toss a little product and scrunch. The off-center part keeps it casual and flatteringly asymmetrical.
A tiny error I made: I used heavy oil and the tousle collapsed. Now I use a lightweight paste to go longer between washes.
What You’ll Need for This Look
- lightweight hair paste – definition without weight
- sea salt spray – tousled texture
- mini diffuser – enhance natural waves
15. Short Wavy Cut with Side-Swept Long Bangs
I kept bangs long and swept them to the side. They hide a high hairline and make the style feel softer. The waves blend the bangs into the cut so nothing looks too blunt.
Keep them trimmed—when mine grew uneven it was awkward. Side-swept bangs are forgiving but need occasional shaping.
What You’ll Need for This Look
- bang scissors – quick trim (stylist-level)
- light-hold hairspray – keeps sweep in place
- small round brush – style bangs while blow-drying
16. Feathered Short Bob with Natural Waves
Feathering the ends made my bob feel airy. The natural waves sit between the feathered layers creating softness around the face. It’s comfortable and avoids looking severe.
I made the mistake of over-drying with a high heat setting once—use moderate heat. This cut works well for fine to medium hair.
What You’ll Need for This Look
- ionic hair dryer – smoother drying
- heat protectant spray – prevent damage
- boar bristle brush – distribute oils for natural shine
17. Short Tousled Bob with Subtle Undercut for Shape
I added a tiny undercut at the nape for shape and the top waves hide it while giving lift. It feels modern and keeps the back from looking bulky.
If you’re conservative about cuts, ask for just a soft taper. Mine was too deep once and growing out took patience.
What You’ll Need for This Look
- hair clippers (tapering) – for subtle nape taper (stylist tool)
- light texturizing spray – movement on top
- matte clay – control without shine
18. Short Wavy Lob with Deep Root Shadow

I left the roots darker to reduce regrowth stress. The shadow at the roots makes the waves read more dimensional and longer between color visits. It’s practical and flattering.
At first I worried about the grown-out look—turned out it looked intentional. This is a low-maintenance color approach.
What You’ll Need for This Look
- color-refresh gloss – tones between salon visits
- purple shampoo – for brassiness control if needed
- leave-in conditioner – maintain ends
19. Wavy Short Cut with Side Tuck for Quick Glam
I use the side tuck trick when I need a quick polished look. Tucking one side behind the ear shows off an earring and gives a neat profile while leaving waves loose on the other side.
It’s an instant “done” move for events. Works well on most short wavy cuts.
What You’ll Need for This Look
- strong bobby pins – secure tuck discreetly
- light-hold hairspray – keep tuck neat
- texturizing spray – maintain wave texture
20. Short Wavy Cut with Tapered Nape (Cools the Neck)
I appreciate a tapered nape for comfort in hot months. The waves on top stay feminine while the tapered neck feels practical and cool. It’s a cut that looks professional and easy.
Be cautious with taper length—the first time my taper was too short and I had a cold neck until it grew out.
What You’ll Need for This Look
- hair clipper guard set – styling tool for taper (stylist)
- leave-in conditioner – keep waves soft
- sea salt spray – texture
21. Wavy Crop with Lifted Roots for Instant Volume
When my roots were flat, this crop fixed it. A little root lift and loose waves make the hair read fuller immediately. It’s the fastest way I’ve found to look refreshed.
I once used too much root powder and the scalp looked dusty—less is more. Use a light hand for a natural result.
What You’ll Need for This Look
- root lifting powder – instant volume
- mini round brush – blow-dry lift at roots
- light texturizing spray – hold without crunch
22. Soft Finger Waves Updated for Shorter Hair

I tried finger waves for a retro-but-clean look. Soft, shallow waves give structure while still feeling modern. It’s more deliberate styling but looks elegant for special occasions.
It took me two tries to get the depth right—don’t make the waves too tight or they read costume. Aim for softness.
What You’ll Need for This Look
- setting gel (medium hold) – sculpt soft waves
- tail comb – shape wave ridges
- mini hair clips – hold while setting
23. Wavy Short Cut with Textured Bangs for Soft Framing
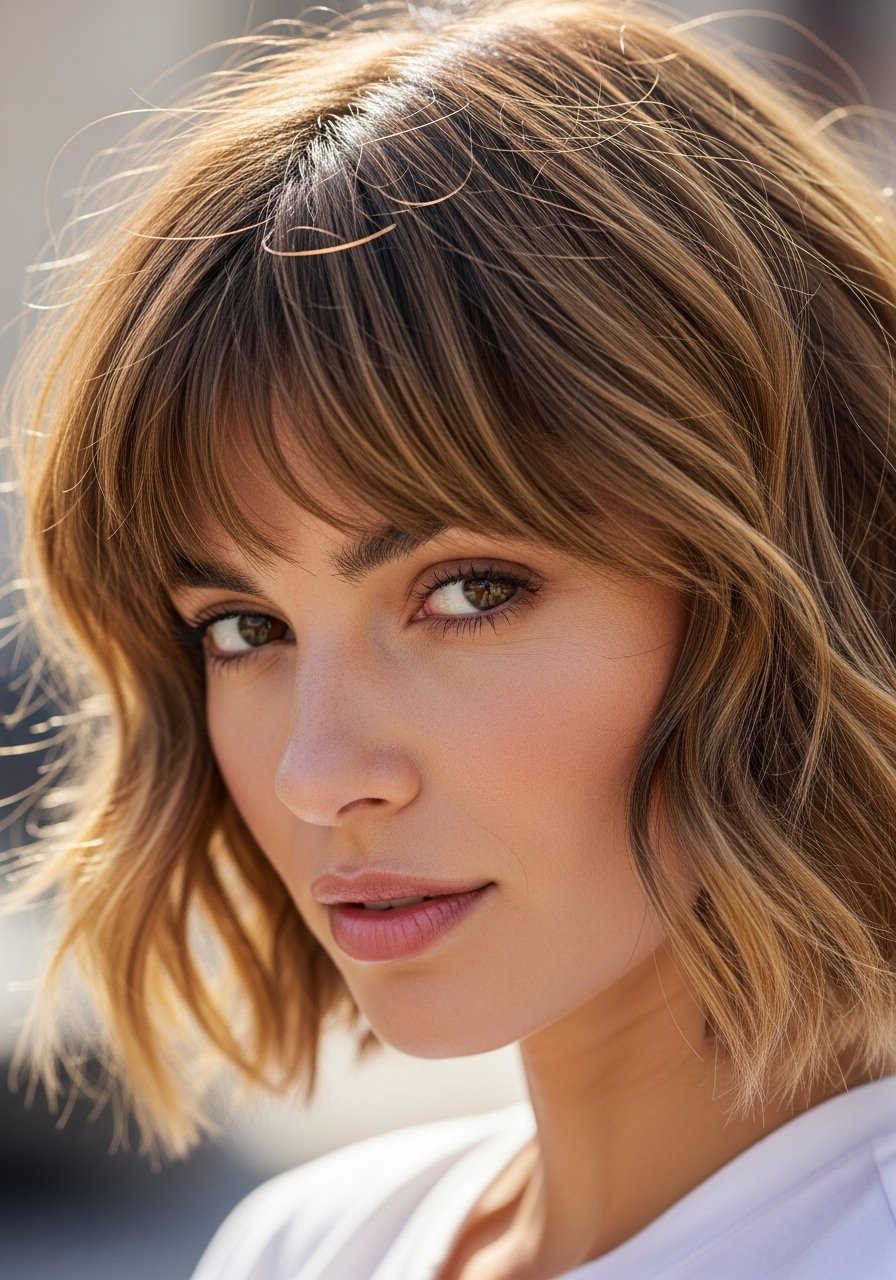
Textured bangs changed how I felt about short hair. They’re lighter than blunt bangs and blend into the waves. I felt my face looked softer without losing structure.
I trimmed them too short once—let them grow a touch longer than you think. They’re great for hiding forehead lines without heaviness.
What You’ll Need for This Look
- thinning scissors – soften bangs (stylist tool)
- light-hold styling cream – tame bangs gently
- mini round brush – shape bangs when drying
24. Short Wavy Cut with Sleek Side Part for Work Days
When I need to look put-together, this is my go-to. A neat side part and controlled waves read professional and feminine. It lasts through meetings and looks intentional.
Don’t over-spray—too much makes it look stiff. A light mist keeps it natural while staying in place.
What You’ll Need for This Look
- light-hold hairspray – hold without stiffness
- tail comb – precise parting
- light shine serum – polished finish
25. Short Wavy Cut with Deep Wave at the Crown for Retro Flair
I love the small nod to retro with a deeper wave at the crown. It adds structure and a touch of glamour without being costume-y. The rest of the hair stays relaxed so it’s wearable daily.
Be careful with product quantity—too much gel makes it stiff. A little goes a long way.
What You’ll Need for This Look
- medium-hold gel – set the crown wave
- boar bristle brush – polish waves
- light shine spray – finish
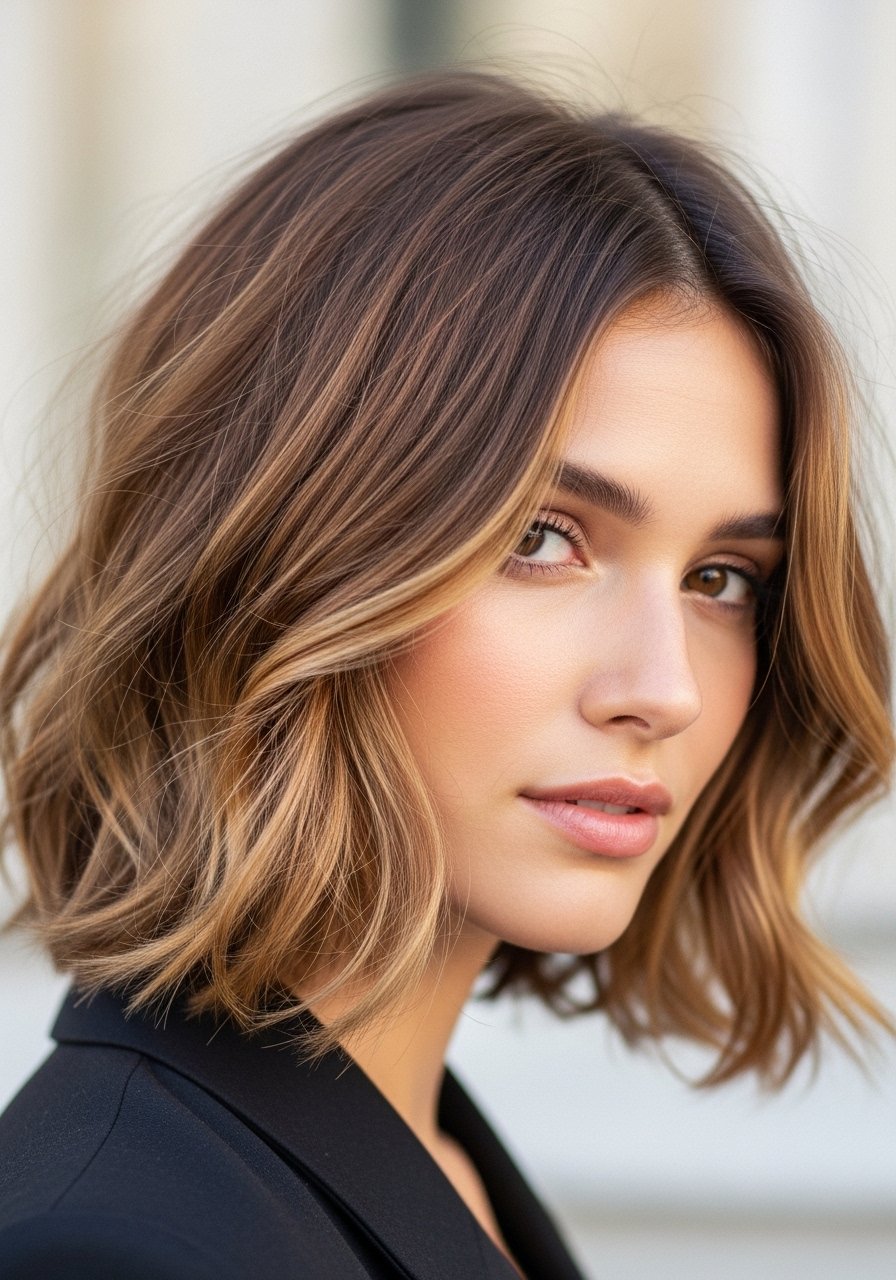
26. Short Wavy Bob with Soft Side-Swept Layers for Mature Skin
Side-swept layers took years off my look. They soften cheekbones and add movement that distracts from texture changes in my hair. The waves help the layers blend and feel feminine.
I once had a cut with too many layers and it looked choppy—ask for blending. This style is forgiving as it grows out.
What You’ll Need for This Look
- light texturizing spray – blend layers
- 1-inch curling iron – soft waves
- leave-in conditioner – keep layers smooth
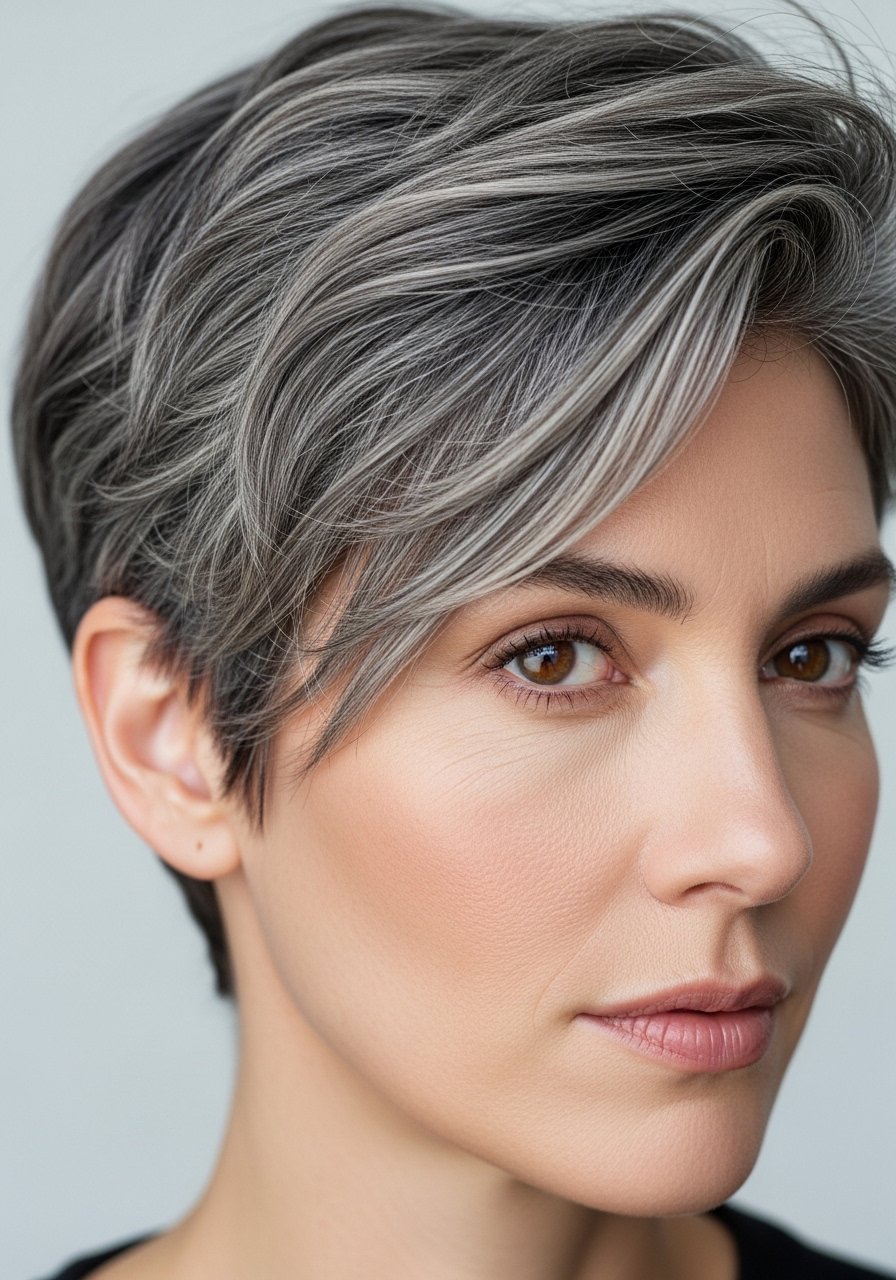
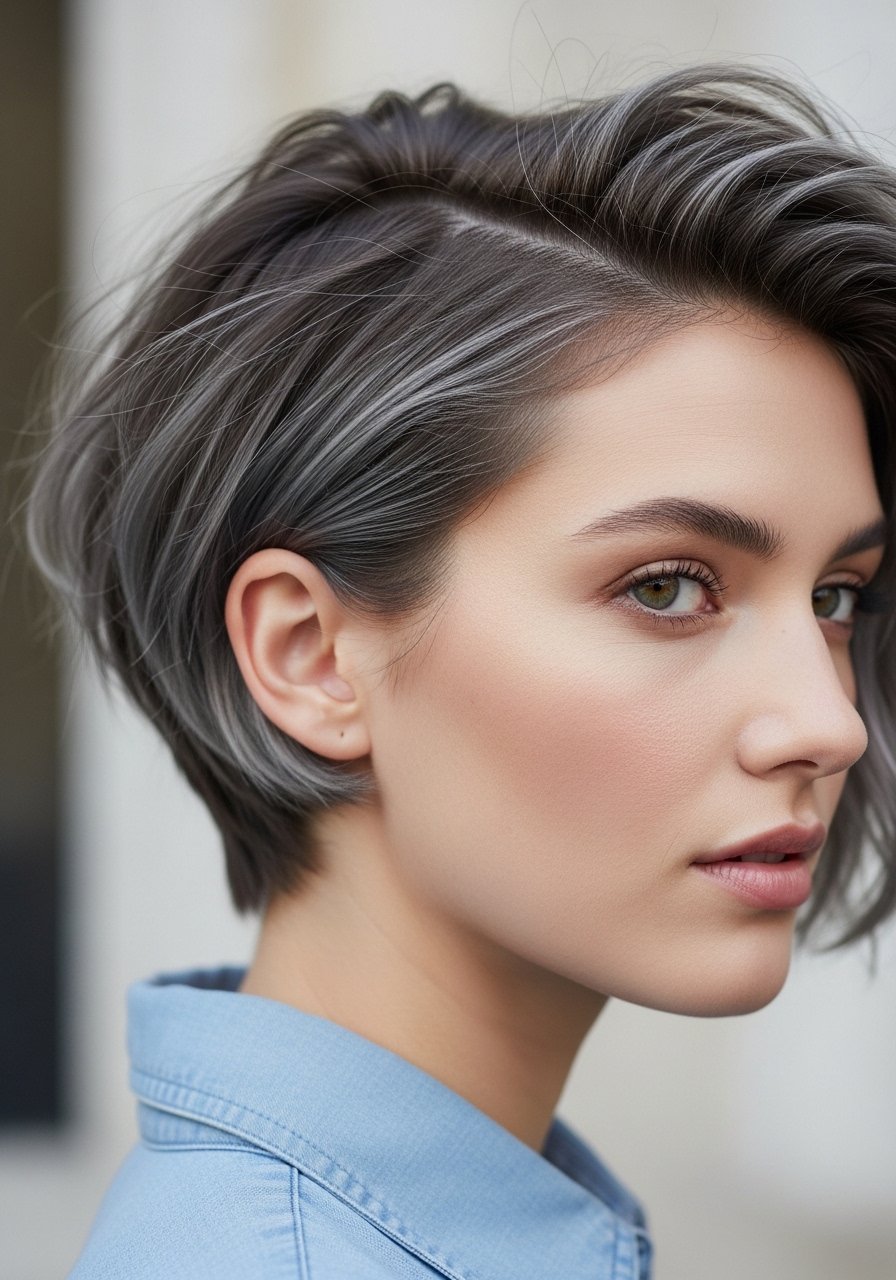
27. Short Wavy Cut with Natural Gray Blended in for Softness
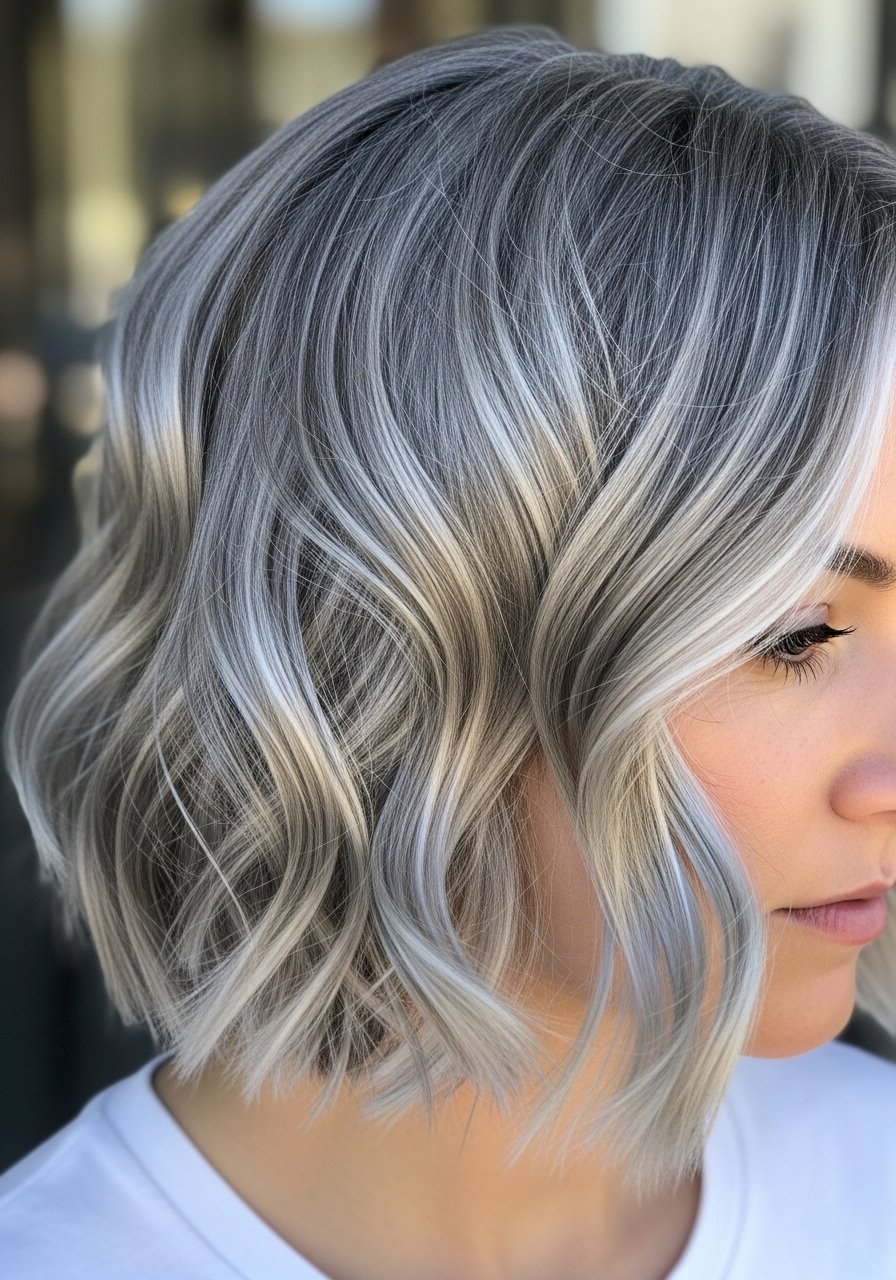
I stopped fighting my gray and blended it into a short wavy cut. The silver strands add dimension and the waves make it look intentional. It felt freeing and actually softened my complexion.
Color blending can be subtle; I avoided stark contrasts and it reads natural. This is an easy, low-fuss look.
What You’ll Need for This Look
- silver gloss treatment – tone blended grays
- leave-in conditioner – keep gray strands soft
- light texturizing spray – natural movement
Final Thoughts
Short, wavy hair after 40 can be easy and flattering. I tried cuts that failed and ones that worked; the difference was always shape and texture, not age.
Pick a shape that suits your face and a routine that fits your mornings. You don’t need to try them all—start with one and tweak it until it feels like you.
Leave a Reply